
In today’s fast-paced world, our smartphones have become an integral part of our lives. They keep us connected, informed, and entertained. However, there are times when we need a break from the constant notifications and calls. That’s where the “Do Not Disturb” feature on your iPhone comes to the rescue. In this comprehensive guide, we’ll walk you through everything you need to know about how to use Do Not Disturb on your iPhone effectively.
Understanding Do Not Disturb: What Does It Do?
Let’s start with the basics. What exactly does the “Do Not Disturb” feature do on your iPhone? It’s designed to give you peace and quiet by silencing incoming calls, messages, and notifications. When this feature is active, your iPhone won’t disturb you with loud alerts or constant buzzing. Instead, it ensures that you’re undisturbed, allowing you to focus on the task at hand, enjoy a good night’s sleep, or simply have some downtime.
How to Activate Do Not Disturb

Step 1: Access Control Center
To activate Do Not Disturb quickly, swipe down from the upper-right corner of your iPhone screen to access Control Center. You can do this from any screen, whether your device is locked or unlocked.
Step 2: Tap the Do Not Disturb Icon
In Control Center, you’ll find an icon that looks like a crescent moon. This is the Do Not Disturb icon. Tap it once to activate Do Not Disturb mode. When it’s active, the icon will turn purple.
Step 3: Adjust Settings (Optional)
If you want to customize your Do Not Disturb settings, press and hold the crescent moon icon. This will take you to the Do Not Disturb settings page, where you can make adjustments like setting a specific schedule or allowing calls from specific contacts.
Scheduling Do Not Disturb
Step 1: Go to Settings
If you prefer to schedule Do Not Disturb for specific times, go to your iPhone’s settings.
Step 2: Select “Do Not Disturb”
Scroll down and find the “Do Not Disturb” option in your settings menu.
Step 3: Set a Schedule
Toggle on the “Scheduled” switch, and then set your desired start and end times. Your iPhone will automatically activate Do Not Disturb during these hours.
Allowing Calls from Specific Contacts
Step 1: Access Do Not Disturb Settings
To allow calls from specific contacts even when Do Not Disturb is active, follow these steps:
Step 2: Allow Calls
Under the “Phone” section in the Do Not Disturb settings, you can choose to allow calls from your Favorites, specific groups, or everyone. Select the option that suits your needs.
Repeated Calls
Step 1: Enable Repeated Calls
In the Do Not Disturb settings, you have the option to enable “Repeated Calls.” When this feature is on, if someone calls you twice within three minutes, the call will go through. This is handy for emergencies when someone is trying to reach you urgently.
How to Use Do Not Disturb While Driving
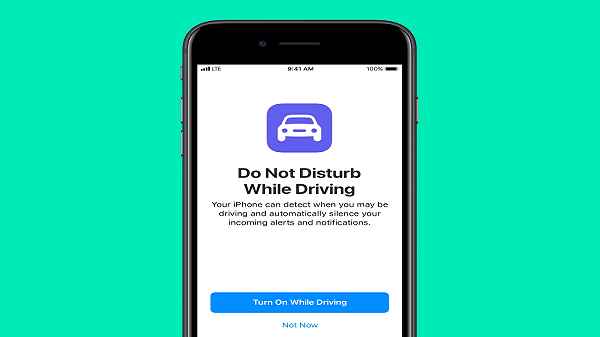
Do Not Disturb isn’t just for when you’re busy or sleeping; it can also enhance your safety while driving. Here’s how to use it:
Step 1: Enable Do Not Disturb While Driving
- Go to Settings.
- Scroll down and tap “Do Not Disturb.”
- Toggle on “Do Not Disturb While Driving.”
This feature uses your iPhone’s sensors to determine when you’re driving and silences notifications accordingly, so you can keep your focus on the road.
Customize Your Do Not Disturb Notifications
You can personalize how Do Not Disturb handles notifications by following these steps:
Step 1: Access Do Not Disturb Settings
- Open Settings.
- Scroll down and select “Do Not Disturb.”
Step 2: Choose Your Notifications
In the “Silence” section, you can decide whether you want to silence calls and notifications always or only when your iPhone is locked. You can also choose whether to allow “Sound” or “Vibrate” under the “Ringtone and Alerts” section.
Using Do Not Disturb During Bedtime
Do Not Disturb can also help you get a good night’s sleep without being disturbed by notifications. Here’s how to set it up:
Step 1: Enable Bedtime Mode
- Open the Clock app.
- Tap “Bedtime.”
- Set your desired wake-up time.
When you enable Bedtime mode, your notifications will be silenced while you’re sleeping, allowing you to wake up feeling refreshed and undisturbed.
How to Use Do Not Disturb for Specific Apps
Sometimes, you may want to silence notifications only from specific apps. Here’s how to do that:
Step 1: Go to Settings
- Open Settings.
- Scroll down and tap “Notifications.”
Step 2: Select the App
Choose the app for which you want to customize notifications.
Step 3: Customize Notifications
You can turn off notifications for this app or choose how they appear while Do Not Disturb is active.
How to Use Do Not Disturb on Apple Watch
If you own an Apple Watch, you can use Do Not Disturb on it as well. Here’s how:
Step 1: Access Control Center on Apple Watch
Swipe up from the bottom of your Apple Watch to access Control Center.
Step 2: Tap the Crescent Moon Icon
Just like on your iPhone, you’ll find a crescent moon icon. Tap it to enable Do Not Disturb.
Conclusion
In this comprehensive guide, we’ve covered everything you need to know about how to use Do Not Disturb on your iPhone. From the basic activation steps to scheduling, customizing, and using it in specific scenarios, you now have a complete understanding of this valuable feature. Whether you need a break from constant notifications or want a good night’s sleep, Do Not Disturb is your iPhone’s best friend. Use it wisely, and enjoy uninterrupted moments in your busy life. So go ahead, activate Do Not Disturb, and experience the peace and quiet you deserve.
Read also:

